Animation Elements – V1
The section on the previous slide was created for the “Why You Need a Website” Blue Whale video. To create it I used what I had learnt from Ant and the videos I have watched on YouTube from creators such as School of Motion and others. The main aspect of this animation is to do with using keyframes to match up the movement and flow of the animation, while also having the cursor changes look realistic and not jarring.
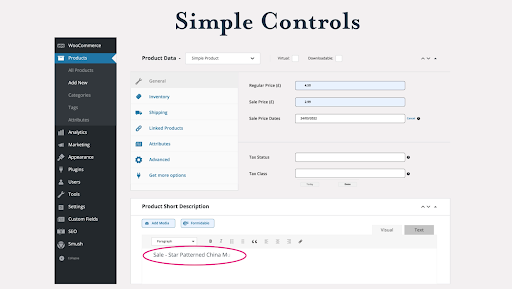
For the context of the video I wanted to have an aspect showing how the client can control and change aspects of their website.
I spoke first with Naomi asking what would be the best way to showcase this, after talking with Gary and him mentioning the back-end of the website being where the client can change things.
After Naomi showed me the process and how it looks, we thought about different ideas on how to incorporate this into the video. Our original idea was to screen record someone pretending to add/change something. However, we then thought it would be more effective if this section was animated in someway instead.
I then went and spoke with Alex about the possibility of having a mockup of the back-end done. I sent him a screenshot and he rebuilt the main section for products on WP.
Once I had the ai file from Alex I was able to start animating.
Firstly, I put the ai file into after effects, inserting it into the video timeline and then found myself some cursor icons from shutterstock that could also be used.
For the first section of the animation I took the arrow cursor and added that into the timeline. I de-scaled the cursor as it was a little too big. Using the position tool, I then moved the arrow off-screen and added in the first keyframe. Once this was done, I then moved play marker along the arrow’s individual timeline to mark where I would want the animation to end (and the cursor to change shape), and added in another keyframe. Then, ensuring that the new keyframe was selected, I manually moved the arrow into the position where the cursors would change.
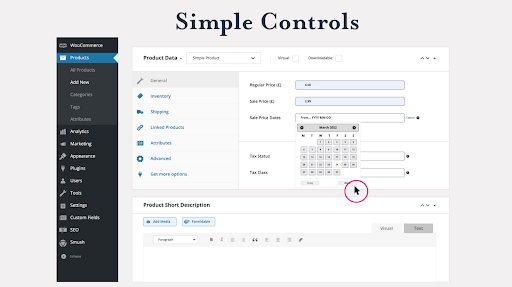
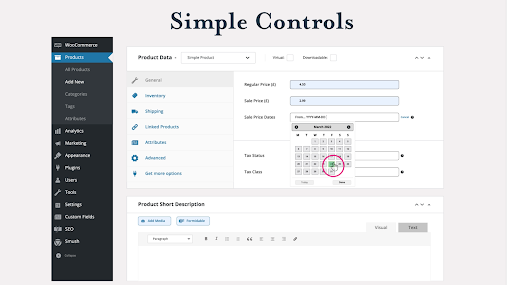
I then brought in the hand cursor and added that into the video timeline. Again I de-scaled the hand to match the arrow cursor as closely as possible. Using the end position coordinates of the arrow, I matched up the hand arrow to carry on from the second the arrow head stops, making it look like the switch happens as it would when on a computer going to select something.
I also created and added in a new shape layer, changed the colour to green and dipped the opacity, timing it so that it changed the date to green when the cursor reached it, indicating that this was the selected date.
Next I used the ai file Alex sent me. I deleted the calendar, added in the selected date to the required section and then saved the ai file as a separate copy.
I then put this ai file into after effects and just like the first one, I added it into the timeline. I added in a duplicate version of the arrow and just like how I matched up the hand cursor, I used the end position of the hands movement keyframes to match up where the arrow should be as the calendar ‘disappeared’ after it was ‘selected’. I then used keyframes again to mark the beginning and end position of the arrows movement, down towards the text box.
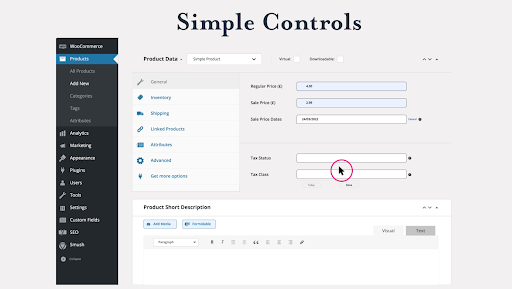
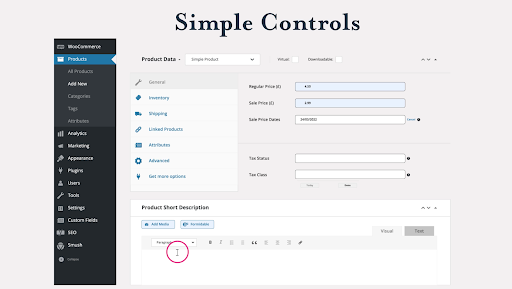
Just as I did with the hand cursor, I found a text indicator icon and added it into the timeline, de-scaling and matching the position to the arrow. Using keyframes I keyed in the beginning position (where the arrow ended) and the end position (hovering where I want the text to begin) using the play marker.
Finally, I used the text tool and wrote out the text I wanted. I then matched up the text box to the end of the text indicator cursor, so it would look like the typing would happen just after the cursor disappeared.
To animate the text I used the text animator tool. I clicked on the button next to the animate text and then selected ‘opacity’. Then I took the opacity down to 0 and went onto the ‘range selector’ section. This is where I then again used keyframes having one at the start, meaning the opacity level was 0 and the text couldn’t be seen. Using the play marker I selected how long I wanted the text ‘typing’ on to be and upped the ‘start’ time to 100, and the text animated on as you could see from the video on the first slide. I then went through and highlighted all the keyframes and set them to ‘easy ease’ to smooth out the animation overall.
